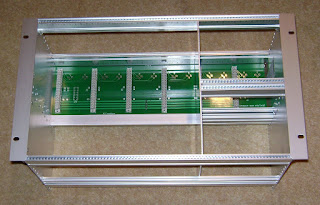
The sub-rack arrived today from SRS so I have spent the evening assembling it. SRS sent the basic rack already assembled which saved me a lot of work.
As this is a four channel mixer, I needed to divide the rack into one space of 4 channels each 6U high and another space two channels wide but divided into two 3U high spaces. In the top space will go the bus amplifiers and in the bottom space will go the monitor section of the mixer. Here is the SRS divider kit:
And fitted to the basic rack.
Notice haw both 6U and 3U modules can plug into the one backplane. You could also have active modules in the lower 3U space if desired. Rather than have another backplane PCB spanning the whole width of the mixer just for two modules, SRS do a converter kit that allows you to fit a pair of regular 32 way connectors direct to the rails. One of these modules could be a headphones amplifier made from a standard EZTubeMixer Eurochannel V3 card where the output stage current has been increased. The other could perhaps be an opto conpressor. For now it is just going to be a simple monitor section.
SRS also provided top and bottom screens but I will not fit them until I have finished wiring the monitor section as access will be easier. I then placed a prototype module and some drilled panels to get a feel for the completed unit:
And lastly tried the rack in the mixer enclosure:
Note the 2U space below the sub-rack. I will fit a standard 2U panel in here and fit later the rotary faders to it.


Hey Ian,
ReplyDeleteI wanted to know if there are any kit for selling me?
I am a diyer:) so I saw Holger's job and I think that I must have to this baby:)
Please tell me
jandoste@gmail.com
Thanks
PCBs for this project are available at:
ReplyDeletehttp://www.ianbell.ukfsn.org/EzTubeMixer/
It also has links to all the documentation for this project and links to the discussion at groupdiy.com
Cheers
Ian